
Growing Peppers in Pots: Five Gallons, Loose Mix, and Six Hours of Sun
Start one pepper in a container of at least five gallons with open drainage and a loose soilless mix. Give it six or more hours of sun, check moisture below the surface, feed by the product label, and move the pot before frost.
What size pot does a pepper plant need?
Use one pepper plant per container and treat five gallons as the practical minimum. University of Maryland Extension gives peppers a five-gallon minimum, while Penn State Extension says peppers can thrive in a pot about 14 inches across.
Those figures describe a floor, not a promise that every cultivar will perform equally in the same pot because a compact Thai type can finish there while a tall bell pepper carrying heavy fruit benefits from more soil volume and a wider base that resists tipping.
| Plant and setting | Starting container | Why it changes the decision |
|---|---|---|
| Compact hot or ornamental pepper | 5 gallons or about 14 inches wide | Meets the extension minimum while keeping the pot movable |
| Jalapeño, Fresno, poblano, or small sweet pepper | 5 to 7 gallons | Extra mix slows drying as the canopy and fruit load grow |
| Large bell or vigorous tall plant | 7 to 10 gallons | A broader, heavier pot supports the plant and buffers moisture swings |
| Hot balcony or travel-prone watering schedule | Choose the larger option for that plant | More mix holds a wider moisture reserve between checks |
Penn State also recommends a container at least as tall as it is wide. Before buying a decorative pot, use the deeper sizing logic in our container size for pepper plants reference and confirm that the finished container can still be moved safely.
What drainage and potting mix do potted peppers need?
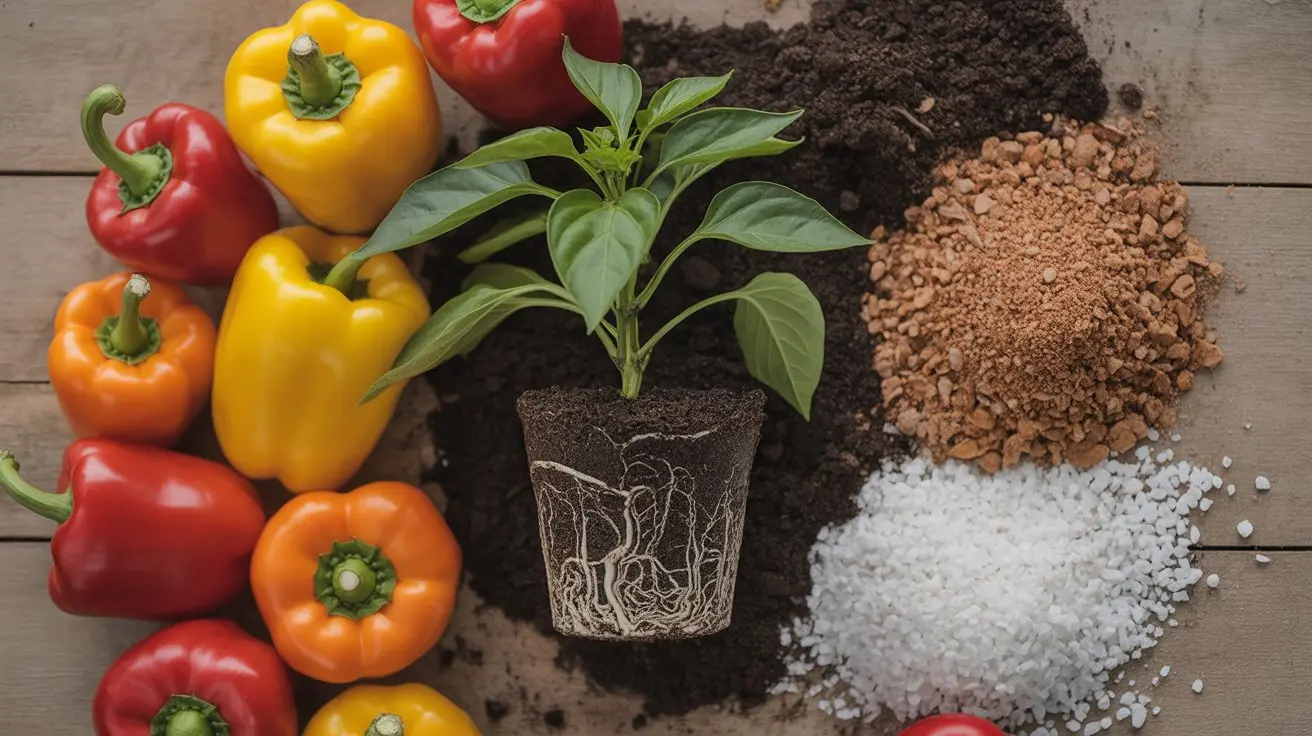
A pepper container needs open drainage holes and a loose, soilless medium. Penn State Extension warns that waterlogged mix restricts root oxygen, and dense garden soil can compact enough to slow both drainage and root growth.
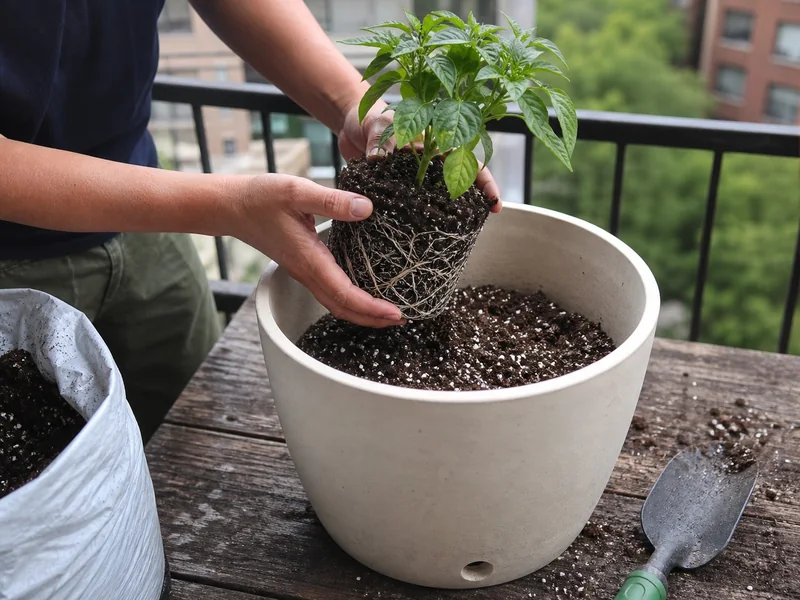
Do not build a gravel layer at the bottom as a substitute for drainage. Put mesh over large holes only if mix escapes, then fill the full root zone with a commercial container mix that contains materials such as bark, coir, peat, perlite, or vermiculite.
Finished compost can supply organic matter without becoming the whole medium, and Penn State allows it at up to 50 percent while a lighter share is easier to manage in humid weather or a nonporous plastic pot.
For pH, Penn State pepper production guidance places the useful range at 5.8 to 6.6. Test the irrigation water and mix before adding lime or acid because a blind correction can move an already suitable root zone out of range.
Which peppers grow best in containers?
Start with mature plant habit, fruit load, and days to harvest rather than heat level alone because University of Minnesota Extension notes that smaller-fruited peppers generally tolerate temperature stress better than large bells.
Compact hot peppers also turn limited floor space into repeated harvests. Thai Dragon grows upright fruit on a relatively contained plant, while a jalapeño plant gives thicker pods without the broad canopy and fruit weight of a full-size bell.
Large-fruited cultivars are still possible when the site has strong light and the pot can hold a steadier water reserve. The trade-off is practical because a large container becomes heavy, and University of Maryland Extension estimates that a moist 20-inch container can weigh about 100 pounds.
Read the seed packet for mature height, spread, support needs, and days to maturity, using terms such as compact, patio, dwarf, or bush as starting signals while the named cultivar description decides the final match.
Plant at the original depth and stabilize the root ball
Transplant after the root zone and nights have warmed, not simply after the calendar reaches spring. Maryland Extension advises waiting until soil reaches about 65°F, while Minnesota Extension recommends outdoor planting after night lows stay above 50°F.
- Water the transplant before removing it from the nursery pot.
- Fill the container enough to keep the stem at the same depth it grew before.
- Loosen only circling outer roots and keep the central root ball intact.
- Backfill with moist mix, press lightly, and leave headspace for watering.
- Water until the first steady drainage appears, then add the stake before roots fill the pot.
A plant raised indoors needs gradual exposure to sun and wind, with Minnesota Extension using a one-to-two-week transition and the specific steps for hardening off pepper plants protecting the early start.
How often should you water peppers in pots?
Check the mix below the dry surface before watering. Press a finger about two inches into the root zone, then water slowly when that depth is beginning to dry rather than giving a small splash on a fixed morning schedule.
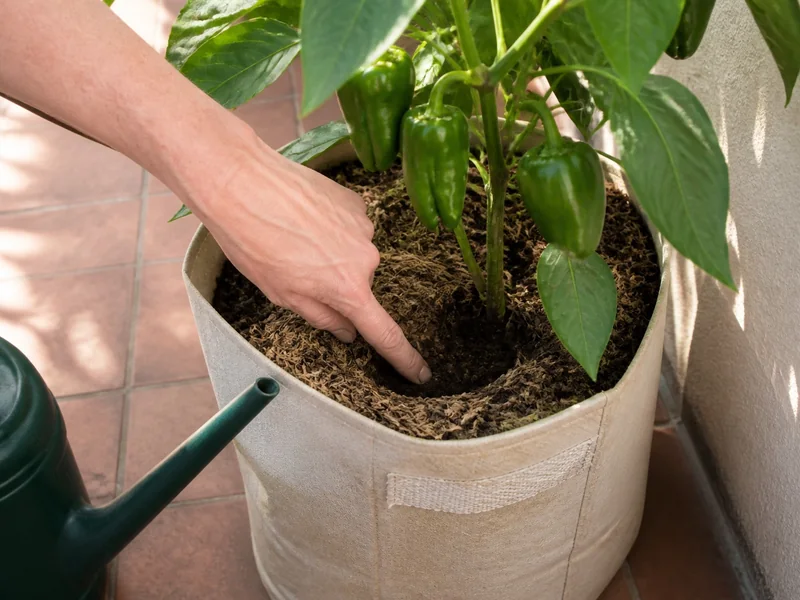
Penn State Extension says containers may need daily water in hot summer weather and should be watered until water begins to leave the bottom. Minnesota Extension adds that small pots in hot, dry conditions may need more than one check per day.
A deep watering wets the full root ball and carries accumulated fertilizer salts through the drainage holes, while surface sips leave lower roots dry and saucer water keeps the bottom saturated.
Pot material changes the rhythm. Terracotta and fabric lose moisture faster than glazed or plastic containers, so the detailed watering signs for pepper plants matter more than copying another gardener's interval.
How much sun do potted peppers need?
Place the pot where it receives at least six hours of direct sun. Maryland Extension says peppers prefer eight to ten hours, but a reflective wall or dark balcony surface can raise leaf and container temperatures beyond what the local forecast suggests.
University of Minnesota Extension identifies dry soil, days above 90°F, and nights outside roughly 60 to 70°F as conditions that can weaken growth or fruit set. Move a container into late-afternoon shade during a heat wave before compensating with constant water.
Dark plastic absorbs more solar heat than a light pot and exposed fabric dries quickly in wind, so shade the container wall or place the pot where leaves receive sun while roots avoid reflected heat.
Mobility is the real advantage of a container here. Mark the sunny positions through the season, then move the pot only when the light or heat balance changes rather than rotating it every day.
When should you start feeding container peppers?
Container fertilizer replaces nutrients removed by growth and repeated drainage. Minnesota Extension recommends starting regular applications about two to six weeks after planting, with the exact timing set by the fertilizer already in the mix and by the plant's growth rate.
Penn State's container guidance pairs slow-release fertilizer at planting with a soluble product every two to four weeks, but the label must set the dose because concentration and release period vary.
Early growth needs enough nitrogen to build leaves, while flowering plants should not receive repeated high-nitrogen feeding that drives foliage at the expense of fruit. Minnesota Extension recommends a product with relatively more phosphorus or potassium when flower and fruit production is the goal.
Do not add calcium merely because a fruit develops a dark end. Test the symptom and the watering pattern first because calcium in the pot does not guarantee that developing fruit receives it.
Use the symptom pattern before adding a product
One symptom can have several causes, so check mix moisture, recent temperature, and where damage begins before making the first correction instead of adding several products at once.
| What you see | Check first | First correction |
|---|---|---|
| Older leaves turn evenly pale | Feeding history and drainage frequency | Use the labeled soluble-feed rate if the mix is moist and roots are sound |
| Leaves yellow while mix stays wet | Blocked holes, standing saucer water, or a dense medium | Restore drainage and let the root zone regain air |
| Flowers drop | Dry mix plus hot days or cool nights | Stabilize moisture and move the pot away from the temperature extreme |
| Dark sunken patch at the blossom end | Recent moisture swings and root function | Keep moisture even and avoid heavy ammonium feeding |
| White or tan patch on the fruit side | Direct sun exposure and missing leaf cover | Protect fruit with foliage or temporary afternoon shade |
| Plant wilts in wet mix | Root color, odor, and drainage | Stop watering and inspect roots before assuming heat stress |
University of Georgia Extension explains that blossom-end rot in peppers reflects disrupted calcium delivery to young fruit, often during inconsistent water movement. UGA also notes that foliar calcium rarely fixes the disorder because calcium does not move from leaves into the fruit as many product claims imply.
Sunscald looks different because it affects the exposed side rather than starting at the blossom end. That distinction keeps a shade problem from being treated as a fertilizer deficiency.
Can peppers fruit indoors in a window?
A bright window can keep a pepper alive, but fruiting requires more light because Minnesota Extension places high light around 250 to 450 µmol/m²/s and warns that peppers become leggy when overhead light is inadequate.
Use a real light measurement at canopy level and follow the fixture maker's hanging-distance limits. The plant should receive even coverage across the canopy without leaf bleaching or excessive heat near the fixture.
- Isolate the plant and inspect leaf undersides before bringing it indoors.
- Keep it away from heating vents that dry the mix and foliage unevenly.
- Move air gently through the canopy rather than pointing a strong fan at the pot.
- Tap flowering branches lightly when an indoor plant sets blooms but no fruit.
- Reduce watering when light and growth slow.
Starting seedlings and carrying a mature fruiting plant are different jobs because the pepper seed-starting process covers germination heat and early light while this container setup supports a much larger root ball and canopy.
When should you bring potted peppers indoors?
Peppers are frost-tender, so a container should move into shelter before a freezing night. Iowa State Extension advises moving potted warm-season plants into a heated room, porch, or protected garage when frost threatens.
A short indoor stay during a cold snap differs from overwintering for months, when the plant needs a pest check, ripe-fruit removal, enough light for retained leaves, and less water as growth slows.
Do not promise that severe pruning or dormancy will guarantee a larger second-year crop. Survival depends on temperature, light, root health, and pest control, and a fresh transplant may be the more reliable choice when indoor space is limited.
The container still earns its place even if the plant is composted after harvest. It lets you protect one valuable plant from an early frost, extend ripening for a few weeks, and reset the root medium before the next season.
Growing Peppers in Pots: Five Gallons, Loose Mix, and Six Hours of Sun FAQ
- Container Vegetable Gardening: Four Keys to Success, Penn State Extension
- Growing Vegetables in Containers, University of Maryland Extension
- Growing Peppers in a Home Garden, University of Maryland Extension
- Fertilizing and Watering Container Plants, University of Minnesota Extension
- Growing Peppers in Home Gardens, University of Minnesota Extension
- Lighting for Indoor Plants and Starting Seeds, University of Minnesota Extension
- Blossom-End Rot and Calcium Nutrition of Pepper and Tomato, UGA Cooperative Extension
- How to Protect Plants from Frost and Freeze, Iowa State University Extension